Add Styles to the Project
Learn all about Add Styles to the Project in this comprehensive tutorial.
- •If you have followed the steps in the entire Django tutorial, you will have a my_tennis_club project on your computer, with 5 members:
- •Now you have a css file, the next step will be to include this file in the master template:
- •Make sure your settings.
- •Every time you make a change in a static file, you must run the collectstatic command to make the changes take effect:
- •In the example above we showed you how to include a stylesheet to your project.
- •You also have to make some changes to the templates:
- •Since we did some changes in the static mystyles.
The Project - My Tennis Club
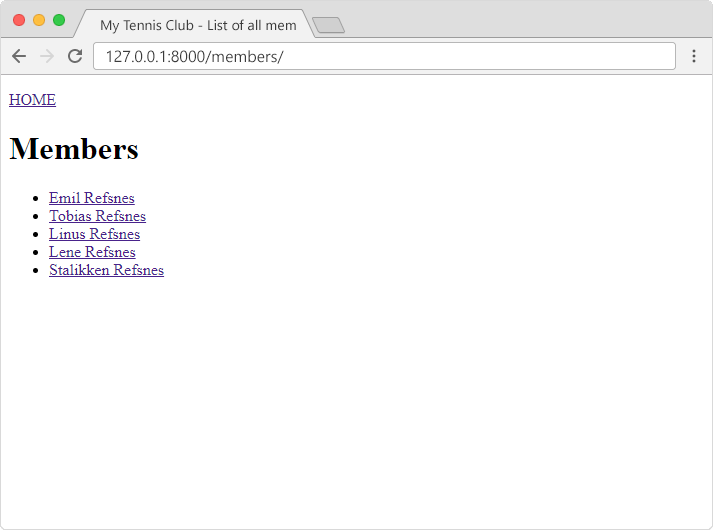
If you have followed the steps in the entire Django tutorial, you will have a my_tennis_club project on your computer, with 5 members:
Run Example
We want to add a stylesheet to this project, and put it in the mystaticfiles folder:
The name of the CSS file is your choice, we call it mystyles.css in this project.
Open the CSS file and insert the following:
Modify the Master Template
Now you have a css file, the next step will be to include this file in the master template:
Open the master template file and add the following:
Check Settings
Make sure your settings.py file contains a STATICFILES_DIRS list with a reference to the mystaticfiles folder on the root directory, and that you have specified a STATICFILES_ROOT folder:
Collect Static Files
Every time you make a change in a static file, you must run the collectstatic command to make the changes take effect:
If you have executed the command earlier in the project, Django will prompt you with a question:
Type 'yes'. This will update any changes done in the static files, and give you this result:
Now, if you run the project:
It will look like this:
Run Example
If you have followed all the steps on you own computer, you can see the result in your own browser:
In the browser window, type 127.0.0.1:8000/members/ in the address bar.
Spice up the Style!
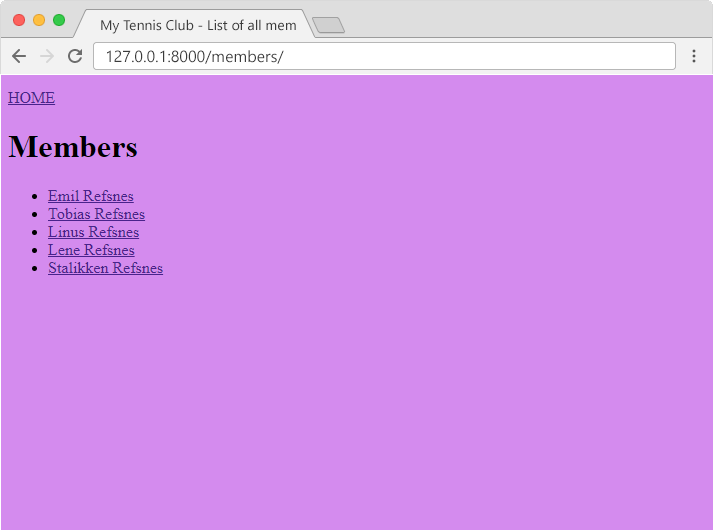
In the example above we showed you how to include a stylesheet to your project.
We ended up with a purple web page, but CSS can do more than just change the background color.
We want to do more with the styles, and end up with a result like this:
Run Example
First, replace the content of the mystyles.css file with this:
Modify Templates
You also have to make some changes to the templates:
We want all pages to have the same top navigation, therefor we insert the top navigation into master.html:
In all_members.html we want to make some changes in the HTML code.
The members are put in a div element, and the links become list items with onclick attributes.
We also want to remove the navigation, because that is now a part of the master template.
In details.html we will put the member details in a div element, and remove the link back to members, because that is now a part of the navigation in the master template.
In the main.html template, we will put some of the HTML code into a div element:
Collect Static Files
Since we did some changes in the static mystyles.css file, we have to run the collectstatic command to make the changes take effect:
Now, if you run the project:
You can see what the result should look like:
Run Example
Or, if you have followed all the steps on you own computer, you can see the result in your own browser:
In the browser window, type 127.0.0.1:8000/members/ in the address bar.
Module quiz
2 questionsWhich of the following is true about Add Styles to the Project?
What is the most common pitfall when working with Add Styles to the Project?
Answer all questions to submit.